Caveat
I’m no expert. This is my understanding of the topic, but I’ve had no formal education and only a very limited amount of practice. Hopefully it’s useful, but you should definitely use it with the above caveat in mind and do a lot more research!
I did draw some pictures, including one of the exposure triangle, but then I remembered this is the internet. If you google for ‘exposure triangle image’ you’ll get loads of them and they’re better than I could create. Also, if you just search for exposure triangle you’ll find loads of videos and web pages, which probably explain it better than I do.
Introduction
Photography is about many things – but one of them is getting a properly exposed image. I’ve written properly in italics because before I even start going into my little intro, it’s important to remember that as the photographer you’re the person who chooses what exposure you want. Exposure is an artistic choice. You can expose in a way that reflects what you saw, but also, in a way which reflects a mood or some intent that wasn’t there at the time. So while people will often talk about the correct exposure, remember that correct is an artistic choice.
That aside, there are four things that affect the exposure of an image.
- The amount of light
- The shutter speed
- The lens aperture
- The film or sensor sensitivity (ISO)
While you are sometimes in control of the amount of light and sometimes not, you are always in control of the other three. Those three control points have a tightly coupled relationship, and since changing any one impacts the exposure of the image, to retain the same exposure you must modify one or two of the others. This is why it’s called the triangle.
Exposure
More light, means brighter exposures. Wider apertures, slower shutter speeds and higher ISO all result in more light. Narrower apertures, faster shutter speeds and lower ISO all result in less light.
If we assume for now that the amount of light you have is either intentional or fixed (i.e. it’s not something you can or want to change) then you need to understand how the other three controls affect the exposure, and the secondary effects each of them has.
Before we do that though, a very quick reminder of what exposure is. Essentially, it’s how much light is absorbed or recorded by the film or sensor; the more absolute light the brighter the resulting image, where-as less light results in a darker image.
With that in mind, let’s look at how the three controls directly impact the exposure of the image.
Shutter Speed
Shutter speed directly controls how long the camera shutter is open for, and hence, how much light streams in and hits the sensor. The long the shutter is open, the more light the sensor or film is exposed to and so with everything else the same, the brighter the image will be. This is true regardless of how much overall light there is, so in dark situations, longer shutter speeds (i.e. slower shutter speeds) still allow the film or sensor to gather more light.
Aperture
The lens aperture is literally a measure of how wide the aperture (or iris) of the lens is. Apertures are referred to in f-stops, and written like f/2, f/2.8, f/4. How they’re calculated and what they really mean is enough material for a full post, what’s important here is that f/1.4 is wider than f/2, f/2 is wider than f/2.8, f/2.8 is wider than f/4 etc. So smaller f-stop numbers are wider apertures and hence let in more light. With all other settings static, wider apertures (e.g. f/4) will allow in more light and lead to brighter exposures than narrower (e.g. f/22) apertures.
ISO
Lastly, we have ISO (it’s not an acronym). ISO describes how sensitive to light the film or sensor is. The higher the ISO rating, the more sensitive the sensor is, and hence less light is needed for any given exposure than for a lower ISO. At ISO 100, you need more light to give the same exposure as you do at ISO 200. At ISO 6400 you need hardly any light compared to ISO 100 to get the same resulting image. As ISO increases, with all other settings the same, the resulting exposure will be brighter.
Secondary Effects
Shutter speed affects motion blur (slower shutter speeds give more blur), aperture affects depth of field (how much of the image is in focus), and ISO affects noise (pixels which are too bright, dark or the wrong colour).
You might ask, why then do these things matter if you can change them in various combinations to get the amount of exposure you want? You’d be right, you can. ISO 100, f/2.8 and a shutter speed of 1/250th of a second, will give you an overall exposure the same as ISO 100, f/4 and 1/125th of a second. By narrowing the aperture (from f/2.8 to f/4) we reduced the light entering the lens, so we had to decrease the shutter speed to compensate (from 1/250th of a second to 1/125th of a second). Likewise, if we expose an image at ISO 800, f/5.6 with a shutter speed of 1/60th of a second, and then increase the ISO to 1600, we double the amount of light hitting the sensor. In order to keep the same exposure, we have to either speed up the shutter (from 1/60th to 1/125th) or we have to narrow the aperture (from f/5.6 to f/8).
We worry because each of the controls also has at least one secondary effect.
- Shutter speed also affects how much the subject of the photograph will be blurred (either caused by the camera or the subjects moving).
- Aperture also affects the depth of field, or how much of the image is acceptably in focus (or out of focus, if you want that effect).
- ISO also affects the amount of noise in the image.
Motion Blur
While the camera shutter is open, light streams in from the scene in front of it. If the camera moves, or the subjects in the scene move before the shutter closes again, then they will be smeared or blurred in the resulting image. How much movement blur you want of the subject is an artistic choice (again). If you take photographs of a fast moving car with a very fast shutter speed (to remove all blur), you’ll end up with a picture of a car that looks like it was stationary. Our brain needs to see some of the blur to feel the movement. That’s why pictures of fast cars often include some blur of the wheels, for example, to give us that sense of motion. However, if you want to freeze the action, maybe a picture of your dog catching a ball, then high shutter speeds are the way to go. Also, when taking pictures, the camera is often supported by only our hands, and so is prone to moving a little (camera shake). Reducing shake means speeding up the shutter so it’s open and closed before the camera can move very far. Therefore choosing a shutter speed to give you the artistic effect you want or prevent hand shake determines one part of the exposure triangle, which means you have to manage aperture and ISO to get the image exposed as you wish.
Depth of Field
Apertures affect depth of field, which again, deserves a full post of its own. But essentially depth of field can be thought of as the area inside which your content is sharp and in focus, and outside of which it isn’t. The effect is gradual, so the centre of the area (the spot your camera has focussed on) is fully sharp and the edges are still acceptably sharp, but only just. Beyond that, the subjects will be less sharp, eventually blurred beyond recognition. Several things affect the depth of field (i.e. how deep the acceptably in focus parts are), and it’s important to remember aperture is only one of them. However, keeping the other depth of field factors the same, aperture has a large impact. The wider the aperture is, the shallower the depth of field is as a result. At very wide apertures the depth of field might be very shallow; taking a close-up portrait at f/1.4 and focussing on the person’s eye might mean their ears are already starting to get out of focus, switching to f/2 or f/4 might result in their whole head being in focus. Depth of field is useful for several artistic reasons, one of which is blurring backgrounds such that the primary subject of your photograph is much more obvious. Landscape photographers usually want as much as possible in their photos to be crisp and in focus, and so tend to work at narrower apertures, such as f/11 or f/16 to get a deeper depth of field.
Noise
Last, but absolutely by no means least is ISO and noise. Some people describe noise as the digital equivalent of film grain, but they’re not absolutely identical. Film grain was caused by the chemical composition of the materials used to make up the film and for many people, it had a pleasing quality even when it was visible. Digital noise is more random and affects the image in a different way and rarely looks pleasant. However, it is true to say that higher ISO values result in either more noise or more visible grain, and if it’s not wanted then that’s a problem. In digital photography, higher ISO ratings effectively mean the sensor is prepared to say ‘yes this pixel is lit’ with a lower level of certainty than in lower ISO ratings. This means that it is prone to saying ‘yes’ when in fact, no photons landed on the pixel and instead it was triggered by nearby electrical noise. It is, as always, more complex than that, but the summary stands. If you use high ISO ratings, there will be lit pixels that don’t actually reflect the true colour or luminosity of the subject and so will show up as noise, and the higher the ISO, the worse this will be.
Early digital sensors were very noisy even at relatively low ISO ratings (like 800), these days, high end DSLR sensors can produce reasonably noise free pictures at much higher ISO ratings like 6400 or above. While noise can be reduced in post processing, the effect of noise is to distort colours and to reduce sharpness in the resulting image.
How much noise you can deal with is a personal choice, and is also impacted by how large you view the images (or whether you print them). Most photographers have a primary aim of keeping noise (and hence ISO) as low as possible. So, while picking apertures or shutter speeds to provide an artistic effect, the ISO is usually picked to be as low as possible while still achieving the desired exposure.
Choosing a low ISO to avoid noise (and so reducing the brightness of the image), and hence forcing yourself to use a slower shutter speed to properly expose it, might introduce blur that you don’t want. ISO therefore is a constant compromise of artistic look vs. digital noise.
Camera Exposure Control
All camera modes are valuable. Each offer different levels of control and hence different levels of support for the photographer. Which mode to use depends on the situation in which you are taking the photographer, the photographer’s preferences, and the desired creative result.
So now we know that to control the exposure of an image, we have to pick a combination of the available light, aperture, shutter speed and ISO. We have to make those choices with the desired creative look in mind and to control the light arriving on the sensor to properly expose the image. How then, do we get the camera to support us in doing that?
Most modern cameras (other than point-and-shoot) offer different modes for controlling the exposure. The common ones are fully automatic, programme AE (often marked as P), aperture priority (A or Av), shutter priority (S or Tv) and fully manual (M).
Fully Automatic
In this mode, the camera picks shutter speed, aperture and ISO to expose the image properly (outside of creative choice of exposure, what the camera thinks is a proper exposure is enough for another post). The photographer has no control of any of the exposure related settings. On some cameras, this mode also includes other features like face recognition, automatic flash, automatic low light exposure, etc.
Pick this mode when you want to grab pictures in a range of lighting situations, and you’re interested in just pointing the camera and clicking, and then getting back to your beer.
Programme AE
In this mode, the camera if left alone will behave like automatic. However, the photographer can if they want override some of the choices (e.g. shutter speed) and the camera will then manipulate the other settings to expose properly, if it can. For many, this is a first step into controlling the exposure. This mode usually includes the option to dial in exposure compensation, which I’ll cover later.
Pick programme AE when you want an element of control sometimes, but you’re not worried about the creative content so much as you are about capturing a moment quickly without having to think about exposure.
Aperture Priority
In this mode, the photographer always has to choose an aperture. The camera will never override that setting, and instead will change shutter speed and potentially ISO to properly expose the image. This setting also usually allows for exposure compensation.
Use aperture priority when you want to pick a specific aperture for creative reasons (depth of field, primarily), but the lighting conditions are variable and you want the camera to quickly work out shutter speed and ISO to properly expose the image. Or you just don’t want to have to think about shutter speed and ISO.
Shutter Priority
The partner to aperture priority, in this mode, the photographer chooses the shutter speed they need for the creative look they want to achieve, and the camera changes aperture and ISO to then expose the image. Again, exposure compensation can be applied if desired.
Shutter priority is useful when you know you want to freeze or blur movement for creative reasons and that is more important than the depth of field of the resulting image. This is often the case with sports or action photography, but is equally important in other situations where movement blur is a creative choice.
Manual
In manual, the camera software does not change any of the settings. The photographer must pick aperture, shutter speed and ISO and the camera will then simply use them. If that results in too much or too little light reaching the sensor, the image will be over or under-exposed. Contrary to some views, fully manual isn’t always the best option used by professional or proper camera users. Fully manual has its place, but so do the other modes.
Use manual when you want complete control over the exposure of each image. This is especially useful in situations where you are in control of the light (such as a studio, or inside a building with a regular lighting situation).
Auto ISO
Many cameras offer automatic ISO in combination with aperture and shutter priority – the descriptions above assumed fixed ISO chosen by the photographer. Some cameras also offer auto-ISO with manual (you could argue, it’s not fully manual in this instance). The ability to set the ISO, or allow the camera to vary it within another mode doesn’t significantly change the purpose of that mode, but gives the camera more flexibility to expose the image accurately. Often, automatic ISO is ideal in situations where the lighting conditions are changing rapidly and are extreme enough that just changing aperture or shutter speed might not give you the ability to cope. For example outdoors on a bright day with some clouds; as the clouds pass in front of the sun the lighting change can be dramatic potentially preventing the camera from exposing the image correctly by just changing aperture of shutter speed. Allowing it to also change the ISO provides more flexibility.
Ultimately the choice of automatic of fixed ISO is again about deciding how much control to give to the camera. If you find that the range of light you’re dealing with is so variable that it results in dramatic shifts of aperture or shutter speed, you might introduce automatic ISO to allow the camera more subtle control.
Additional Points
It’s important to remember that in automatic, programme AE, aperture priority and shutter priority that the camera’s primary goal is to expose the image in a way it considers acceptable. To do that it will pick apertures, shutter speeds and ISOs and it doesn’t know what you had in mind creatively. It won’t know that you wanted or didn’t want movement blur, it won’t know that you wanted or didn’t want a large depth of field, etc. The only difference in the settings is how much the photographer controls versus how much the camera controls.
In manual, the camera is no longer trying to expose the image, it will report the exposure (based on the built in metering), but the camera will trust the photographer that the resulting image is what they want.
Exposure Compensation
Cameras think the whole world is 18% grey. Sometimes they get it wrong.
A camera has no idea what is in front of it, nor what your artistic intent was. When the camera exposes the image in any mode other than fully manual, it has made some decisions about how bright the overall image should be (i.e. how bright the highlights should be, and how dark the shadows should be). It doesn’t always get it right. If you photograph a building outside on a bright day, you might find the building looks quite dark, or if you photograph people against a dark background it might over expose the people you’re trying to take pictures of. You’ve got three choices in situations like that.
- You can change one or more of the control points you’re already managing (for example, you could change the aperture if you’re in aperture priority mode), but you may have to accept compromise on your creative choice
- You can switch to manual and change any of the control points (this allows you to retain your creative intent, but negates the benefit of using semi-automatic modes).
- You can dial in exposure compensation if you are in a mode which supports it (fully automatic modes do not tend to support this feature).
Exposure compensation tells the camera that it needs to make the image brighter (expose it more) or make it darker (expose it less) than the metering suggests. It achieves that in various ways depending on which mode it is in. If the camera is in shutter priority mode (so you have selected a shutter speed), but you want to add exposure compensation (to brighten the image), the camera will widen the aperture, letting in more light and making it brighter. If you are in aperture priority and the image is too bright, adding negative exposure compensation will shorten the shutter speed, resulting in a darker image.
Obviously, if you’re already at the limits of the control points, for example in shutter priority mode, you want the picture to be brighter but the camera is already at the widest aperture, then the image still won’t be exposed in the way you want it, and you’ll need to switch to another mode or use manual to get the exposure you desire.
Exposure compensation allows you to override the cameras chosen exposure without having to switch to a fully manual mode, and lets you quickly change between lighting situations without giving up the creative elements you have chosen.
Other Stuff
There’s clearly a ton of stuff I’ve not covered. Adding your own lights, flash or strobes allows you to change the amount of light yourself, impacting how you choose the other controlling factors. Your camera meters the light in front of you in different ways (phrases like spot, evaluative, weighted, matrix, etc.) and that in turn affects the elements of the image that are exposed at different levels. Your camera has no real clue what is in front of it, and so is generally trying to expose the overall image as if it was grey (middle grey, reflecting about 18% of the light landing on it); that’s okay in many cases, but equally not okay in many others. I’ve not covered dynamic range (the range of light from the deepest shadow to the brightest highlight), nor colour balance or any number of other elements that will affect the overall image. I’ve also not covered stops or exposure value (EV), how to know what changes to make to shutter speed to compensate for changing aperture from f/1.4 to f/8 and vice versa.
Summary (tl;dr)
- Aperture – wider gives more light and shallower depth of field. Narrower gives less light and deeper depth of field. Smaller numbers are wider (f/1.4 is wider than f/2, and f/22 is narrower than f/8).
- Shutter Speed – slower gives more light and more motion blur, faster gives less light and less motion blur (frozen action). Shutter speeds are given in seconds or fractions of a second. Most cameras show 60, 125, 250, 500 etc. when they mean 1/60th, 1/125th, 1/250th. So bigger numbers usually means faster (shorter) shutter speeds and hence less light.
- ISO – lower is less sensitive and needs more light to expose but has less noise, and higher is more sensitive, needs less light to expose, but is noisier.
- Exposure – it’s a creative choice, affected by the amount of light present, and the combination of aperture, shutter speed and ISO.
- Camera modes – every mode has a purpose, and there’s plenty of overlap. The more control you give the camera, the less control you have over the creative elements of the picture, the more control you take from the camera, the more you have to think about exposure yourself.
- Exposure Compensation – the world is 22% grey, but only when you blend it all together. Sometimes you want parts of your image exposed differently, and exposure compensation allows you to quickly add or remove light from the overall exposure (the camera will have to change one or more of ISO, Aperture or Shutter Speed to achieve it).
- Lastly – this is only an overview, it’s a summary or approximation, and there’s a lot more depth.
Other Resources

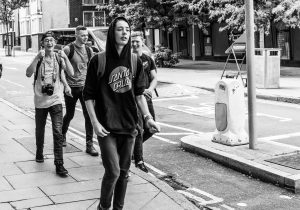
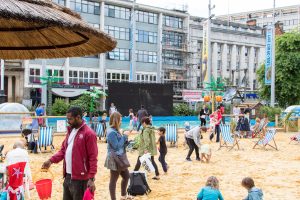
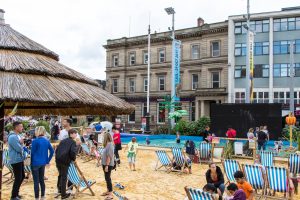
 The Nottingham Beach is on again this year. The council and am event company work together to turn the Old Market Square into the seaside. There’s sand, water, rides, arcade machines, fish and chips, donuts, slushies, ice cream, it’s great. The kids love it, families love it, and it’s always busy. This year is no exception. I went into the city today hoping it was going to be very sunny with heavy downpours. I definitely get my best shots when people are surprised by sudden rain and go running. Sadly for me it stayed dry, although I guess the families preferred it that way. I hadn’t taken any shots of the sand area because there weren’t any interesting compositions and it was mainly just families having a good time.
 He picked up his radio, but before he could say anything, he caught the eye of an older member of staff who came over. The first guy explained what had happened, I explained that it was a public space and I was within my rights to take photographs. The first guy went off on his tirade about me taking pictures of the kids without permission, to which I said I didn’t need it but hadn’t been anyway. I then tried to explain four times why I was taking the pictures, that my wife had said she wanted to see what the place looked like. Each time I got three words into that, the first guy talked over me saying, “What are you, a nonce”? Eventually, I just held the gaze of the second guy, and he got the first guy to stop talking.
 My adrenaline was through the roof, and I was pretty fucking angry. There are a number of reasons for being angry. Firstly, 99% of the people in that location are taking photographs non-stop on their mobile phones. Themselves, their kids, other kids, other people, without a thought in the world, and then posting them straight to Facebook or Instagram or Twitter. I review every shot I take, and if I’m not comfortable with the content, or think that it paints people in a bad light, I don’t post it anywhere. People with mobile phones sometimes automatically post everything to social media without even a second glance. Secondly, and related to that, the only reason I got stopped is because my camera is large. It’s not a long lens focally, but it’s a physically big camera and lens. If I’d been using a smaller camera he wouldn’t have even blinked.
 Amusingly, I had completely forgotten that at the start of last week I changed the shooting mode on my camera. My camera supports two cards, a CF and an SD. For a long time, I’ve been using the CF card and running into the SD card only when the first is full, to give me a buffer in case I’m taking a lot of shots. The SD cards are slower, so I don’t want to shoot to them constantly. However, last week, after watching yet another YouTube video with someone saying ‘my CF card died’, I switched to dual card mode, where the camera writes a RAW file to the CF card, and a JPG to the SD card. I had utterly forgotten this as I deleted the JPGs in front of the security guard. Leaving the RAW files intact on the CF card. Oh well.
