Cloak and not Dagger
 This is the fifth post in the Sasha DuBois painting diary set (the others are one, two, three and four). I’m a bit up and down about my painting skill level at the moment (my regular normal state for anything I create), some days thinking I’m quite happy with my skill level thank you very much and other days a bit down because I feel I should be better, if I just spent a bit more time. However, I spend as much time as I spend and I enjoy that time and at the end of the day that’s what truly matters, it’s relaxing and enjoyable. I’m happy with being slightly better than barely average (at the moment).
At the end of the fourth post I’d just put the base coat onto the coat (this could get confusing), using scab red. I then spent a little while (a few days) not really painting anything, and finally got back into the swing by putting a lot of effort into the zombies. I also managed to wash and brush the coat on this mini and then put some black onto the boots (too thickly, sigh). Anyway.
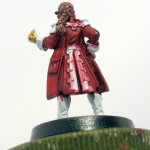
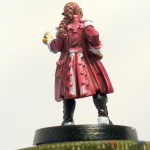 I wanted to try layering some washes onto the coat to really give the creases depth. I think it worked okay, although next time I think I’ll try adding some brown / black to the wash and doing the edges in even more detail to make it really stand out. The dry brushing is so-so, it certainly picks out the highlights but it’s too indiscriminate for the coat really, and probably could have been done over a longer period of time with less haste and more layers. I’m still in two minds about the colour choices for the additional coat work (the bits which are still partially white at the moment, including the cuffs and the panels on the rear of the coat). I’m edging towards yellow (no pun intended) in which case I’ll probably give the areas a thin coat of grey to try and even them out (yellows tend to be very translucent). My problem with yellows is that they can go very muddy very quickly and are tough to shade (for me). If you look at the zombies I did recently you’ll see some yellow on the ropes which is washed with a brown wash and is quite effective, but I want something much brighter and livelier on the coat. I could go with a metallic look for the strips down the back, and something different for the cuffs, or I could go with a bright blue or bright green to complement the trousers. Maybe a green would work actually.
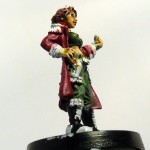 Anyway once I’d put a few dry brush layers on, and while waiting for one of the zombies to dry, I put the first layer of black onto her boots. I’m going to go with black leather and silver / metallic plates on the front. Sadly, the black is too thick and I wasn’t paying enough attention when I put it on. I’ll be able to work around it and it hasn’t obscured any significant detail but I should have been more careful. Highlighting black is something you have to be very careful about, since you can’t shade it. There’s a school of thought which says you should start with a grey base coat and wash with black, before highlighting, but I find you end up with a pretty grey result. So I’ll start with black and then build up some layers of grey on top of that (which is why it would have been better for the black to be thinner).
I need to paint her half-gloves black, but I’ll need much thinner paint to prevent it obscuring her hand detail and a much finer approach since the fingers and holes in the gloves are already finished. I’ll probably take a few deep breaths before I have a go at that – I did consider it after doing the boots, but figured I wasn’t in the best frame of mind right then.
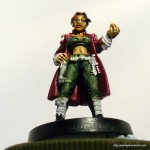 At some stage I’ll have to tackle the gun and hardware hanging from her belt (as well as the belt) and we’re basically starting to get into the detail now. She’s also holding onto a pocket watch which I’ll need to get as shiny as possible so it’s clear what it is. Still plenty to do on this piece, despite having covered over 80% of it with paint so far.
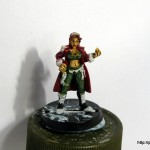
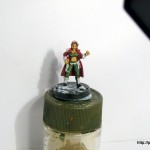
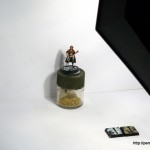
As well as taking the regular progress shots, I took a few at different distances just to give you another idea of the scale of the miniature and the working environment! There’s three shots from increasing distance, the middle shot is probably most representative of how the miniatures look (to me) when I’m handling them after they’re finished. I tend not to hold them up to my nose or look at them with 7 megapixel cameras.
No need to comment on the bad setup for taking photo’s, I know that I get a lot of shadows with this setup, but it’s quick and easy to do in my normal painting space and it suits the diary format. The black thing in the right of the shots is the daylight bulb lamp I use when painting (to keep my hands warm!) The pot the mini is standing on is a Tamya paint pot from circa 1987, which had paint I used on a remote control model car a long time ago. The chain inside it was for building dioramas with and has been inside the pot since about 1989 – unused. I wonder if anyone in my close family is missing some jewellery.

