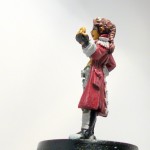
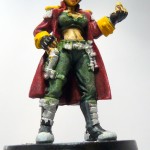
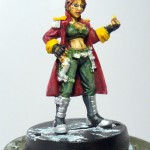
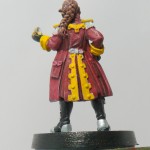
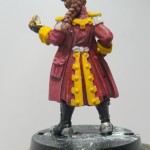
The Devil is in the Detail
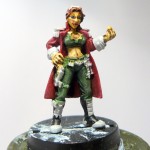 This is part six in an increasingly long painting diary for my Sasha DuBois miniature. There were five parts before this, which you can get to in order from here, 1, 2, 3, 4, 5. One of the most crucial things this diary has taught me is that no matter how good you think your painting is, no matter how well you think you covered an area, no matter how fine you think the line you just painted was, photographing it with a 7 megapixel camera and blowing it up will prove you wrong. In some ways it’s quite handy, for example I’ve just come to the end of a session working on Sasha, and reviewing the photo’s shows me some places where I need to look a little harder and touch the various colours up a little bit. I guess with a magnifying glass /visor I may be able to see that kind of detail, but when holding the miniature normally and painting it at the moment I can’t.
Anyway today I was in the mood for painting, rather than having to make myself paint, I wanted to paint. I’ve been looking at getting some new miniatures and I suspect they’re going to be pretty detailed 25mm scale (rather than ‘heroic’ scale, and chunky), so I also wanted to test my 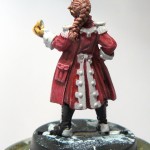 skill and make sure I can paint really small stuff. I have loads of fine detailed female mini’s, so I picked one that was wearing virtually nothing (makes it quicker to paint) other than a tiny, thin thong and some nipple covers, and started working. I really worked hard on the tiny detail and ‘got my eye in’ as it were, and once I was confident of my brush control, I moved on to Sasha. As you’ll see in the photo’s, despite that, the fine detail is actually pretty rough when looked at really close, but trust me in regular viewing the lines look fine. Anyway the first task was to undercoat the cuffs, epaulettes and detail on the back of the coat ready for some base colour. In part five I was musing about the colour choice, and in the end I went for the one I originally wanted, yellow, and I’ll just have to try and stop it looking muddy. I have some plans in that area, such as using very light colours to highlight it to keep it nice and bright. Anyway, I covered the cuffs and other areas in a thin grey coat being careful to avoid the already painted surfaces. It worked really well and the red that I’d splashed everywhere covered easily.
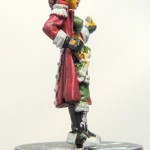 Since the grey went so well and I was feeling pretty confident, I decided to go ahead and paint the half gloves black. I made sure the black was nice and thinned down (as I have been doing more and more of late) and then with the smallest brush I have, I painted in the gloves. They worked out pretty well, the right hand clearly has an indication of where the glove fingers finish, but the left hand is less clear so I just picked a spot that looked good, and painted a straight line across the flesh. I ended up going onto the grey cuff a little and was pleased that I’d done the gloves before painting the cuffs yellow. With the gloves black, getting a little yellow on them when painting the cuffs won’t be so bad, but the other way around would mean having to re-undercoat the cuffs before putting more yellow on them, much more work. Once the gloves were finished, I touched up the grey on the cuffs to cover the black. After looking at the photo’s, it’s clear that with some magnification I could still do some further tidy up work on the gloves and cuffs. The cut-out areas aren’t quite crisp enough yet and still have some flesh tones on what is essentially leather glove. I’ll wait and see how I feel about the overall piece and whether I’m looking too hard at the high resolution shots.
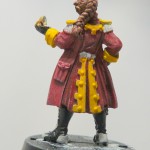 I spent a little while going through the paints until I found a couple of yellows I quite liked, and then I base coated the detail using the darker of the two. I was a little unsteady on the detail on the top of the coat (back), and had to re-touch that with some scab red, but otherwise the yellow went on pretty well. I really focussed hard on trying to keep straight edges, normally I’d be a bit cavalier by this stage and it’s one area I let myself down on miniatures. I put a lot of effort into the big areas, and then get tired and disinterested once I get down to the detail. So I worked really hard to stay focussed. I think leaving a few days between each major step helps, because I don’t get too bored with one figure and start rushing it.
I’m really pleased with the colour choice, I think the yellow looks excellent against the scab red. I’m not sure what colour to do the cord hanging down from the epaulettes yet, maybe yellow, maybe gold, or maybe something else entirely (green?) but for now I left them alone in case I don’t want to do them yellow. I may look around on the web for some period costume and get some colour ideas from that.
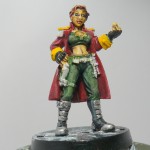 I spent a little while touching up the black on the boots, and I tried putting some light grey highlights onto them, I’m not really sure the highlights worked out that well, you certainly can’t easily see them on any photo’s. I really should look at a pair of leather boots as a reference and see how they look. I know what I should do which is be more bold about light-grey or white highlights since leather reflects a lot of light. But it’s hard putting white onto a black surface, you need a lot of confidence to put the strokes into the right place and be happy with the result. So I stopped messing with the grey and painted the boot metalwork silver. After that dried I gave it a wash with an armour wash which I really like. It sits well in the recesses and gives the silver a worn look.
And that was it for this session, undercoating, yellow base coat, half gloves, boot metalwork and shoddy highlighting done. I did notice afterwards that I completely missed the detailing on the front/top of the mini (the crop-top) which needs a grey undercoat and a yellow base coat so I’ll do that next time.
Here’s a few shots that didn’t make it in above, some are the same stage from a different angle and others show stages missed out above. In order, left half glove, front shot with yellow base coat, two shots of the boots with basic silver coat, and finally a rear shot after the boots have the armour wash.
Part seven will be posted in 3 days.

