Fancy Pants
This is the fourth diary entry in the ‘Painting Sasha DuBois’ series, parts one, two and three can be found by the simple click of a mouse.
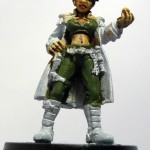 With some miniatures (for example, a zombie army you use for gaming) it’s entirely possible to make yourself get on and paint them. The technique is different, you’re trying to paint them reasonably quickly, and it’s not likely anyone’s going to be inspecting them individually from 12 inches away, but they have to look good at distance as a unit on the playing surface. So you can forgive yourself short-cuts and missed lines and broad brush strokes (as it were). However, when I’m painting a miniature I like, and I really want to look good I have to be careful not to make myself progress, because I find that I lose the spark that makes me care about the detail. If I push it too hard, it ends up looking rushed. So I barely touched Sasha when I sat down a couple of nights ago (hence the short part three post) and although I’ve made more progress again it’s slow going.
I’d just spent a day painting a mini with blue and scab red and wanted to avoid that exact combination, but I knew I wanted to do Sasha’s coat in the red because it just looked so cool when washed / brushed. So I went for green on the trousers and top as a nice contrast. In the past I’ve made the mistake of starting with a base layer that’s too dark. The issue there is that the wash makes little difference or you have to use a black wash to get any result, and then any amount of dry brushing is just too severe. So, this time I went with a lighter green base coat with a plan to wash that with a dark green to give it some depth. I was in two minds about starting with the trouser layer, there’s a tricky bit of work between her legs (no sniggering) where the coat shows through. There’s a good argument to be made for doing the coat first, since it’s slightly easier to work on the legs and not hit the cloak. However, if you put a green wash on the legs there’s a chance it’ll run onto the back of the coat, but when you wash the coat due to the layout of the model it’s very unlikely to run onto the legs. So I went with legs first.
 Once that was done I left it for quite a while and painted some other stuff and watched a bit more Black Adder. I considered trying some blending and in the end went for a half-and-half approach much like the face only with a bigger canvas. I washed the whole leg / top area with a dark green and then let that fully dry. Once done, I washed only the deep sections of the trousers and top with the same dark green, so the edges and any deep recesses. Once that had dried fully I repeated the process twice more. This gave those areas some really deep colour, but didn’t darken everything due to being washed three times. I was quite pleased with the result. Once that had fully dried I brushed the area with a couple of lighter shades to try and bring out the highlights. Dry brushing small areas like this really shows how bad the technique is for detail work, you end up with a highlight that doesn’t really sit on the high points, but just covers any piece of metal which sticks out a bit and you usually end up showing the pitted metal surface. Anyway, that’s how I do it at the moment, so that’s what she got. I was pleased with the washing (semi-blending) and one of these days I will progress to trying some blending on a full piece.
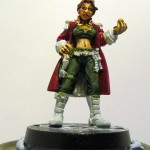 The next stage was to cover the biggest single surface area on the piece, the coat. I spent a little while looking over the piece first. The coat has some epaulettes, big cuffs, and some decoration on the back and I wanted to make sure I knew what I was painting red and what I was leaving to be covered later. It’s much harder to see what’s what when you’re 2 inches away from the figure so this is the time to sit back and look at it from a distance to see where the different layers come together. Once that was done I set about putting a thin layer of scan red down. Starting with a fairly decent sized brush I covered all the easy to reach places.
Then I took a few deep steadying breaths and used a much finer brush to cover the back of the coat between the legs, the sides and the collar area.
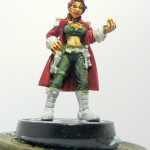 It’s not perfect, I’m disappointed with my finer brush control but you can’t really see unless you photo the thing with 8 megapixels or hold it really close to your eyes. Putting on a dark red wash will hide some of the faults, because it will pool at the edges and hide where the green and red don’t form a solid or straight line. Also I’ll be able to sneak in some corrections later on.
I decided that was enough for one night, I’m looking forward to washing the coat and putting on multiple layers of wash in specific areas, but I wanted to rest and make sure I was ready to make a good job of it. Also somehow it had gotten to nearly midnight without us noticing so I was getting tired anyway.
I really like the combination of red and green on this figure, and I’m looking forward to picking out some of the details on the coat, I’m not sure yet if I’m going to go with a metallic gold or a yellow for the highlights. Yellows are hard to get right I find, and they’re really hard to successfully wash to darken without making them look dirty. On the other hand I’m not sure how well a metalic gold fits in with the steampunk look anyway and maybe a dirty yellow will work out fine. There’s a lot of metalwork on the legs I’m going to have to be very, very careful with as well (guns and the like) and I can see myself doing some green fix up work.
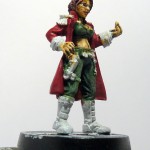
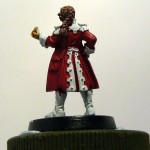 With only two clothing areas painted, the miniature is already 80% covered, the only other large area is the boots (black / metal combination I think), and all the rest is in the fine detail.
And so that’s the end of part four, you can check out part five and beyond over here.
