The eyes have it
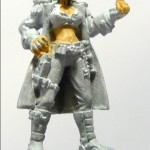 This is the second part in a series of articles covering the progress of a single miniature painting job (Sasha DuBois, Time Chaser). In the first article I covered the basic preparation of the miniature. In this article I show you how I can take a perfectly good miniature and ruin it from the outset with a hack skin and face job. Rather than just include a long line of images near the end, I’ll scatter them throughout the paragraphs, each one has a title which should let you know which stage it’s at. For full pictures and descriptions you can still check out the Picasa web album.
Once I’d prepared the figure I had a think about basic colour schemes and skin tone. I’m really uncomfortable painting much other than ‘sun beaten caucasian’ skin, I’ve tried a range of colours in the past from the realistic to the fantastical and either my technique doesn’t suit them or I’m just not able to convert what I see in my head into colour choices and colour application on the final figure, so I went with my traditional skin colour choice. For the rest of the figure I want something bold and colourful, this is a steampunkish / sci-fi figure and I really want it to be vibrant.
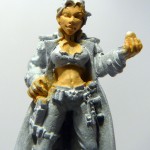 Once I’d decided that I set about sorting out the skin. I read a really useful post once about painting the eyes on miniatures (which are the hardest bit to get right, I think), in which the author said you should do the eyes as early as possible because if you truly screw them up, you can clean all the paint off the mini and start again. If you wait until you’ve completed 90% of the figure before you do the eyes that’s a lot of work down the drain. In order to paint the eyes early, you really need to paint the face / flesh early on as well. Happily, this usually coincides with my general approach of painting the ‘lowest down’ sections first.
If you’re going to dry-brush a piece of clothing, it’s much easier to keep the paint off layers that are set deeper than the area you’re dry-brushing than it is to keep paint off raised areas. For that reason I tend to paint from the inside out, the deepest to reach places first. Sometimes I have to change this plan depending on the layout of the mini, but it’s a good starting point. The first step is to put a couple of thin layers of Citadel’s Elf Flesh onto the exposed skin. This figure is interesting in that it’s got half-gloves with small cut-outs on the hands, and there’s an open area on the chest where the skin shows through.
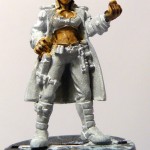 Once I’d gotten the first couple of thin layers on I let it dry completely. If you’re going to apply a wash it’s important to let the paint dry fully before you do so, otherwise you get odd pooling and rippling effects. Fortunately, taking the photo’s means I tend to push my daylight bulb really close to the miniature and as a result, drying time is reduced! I used to use a lot of chestnut ink from a really old set of inks I had, when applying flesh washes. It has a slightly glossy finish, but once dry-brushed it looks more matte. However, since I blew a load of money of the Citadel paint set I thought I’d try using the washes you get with that, and the best one for flesh tones is the Citadel Delvan Mud. The aim of using a wash is to darken the overall area, but to really darken the deep recesses to bring out the detail. The most skilled painters then layer paint back on after the wash to bring out all the highlights, however I’ve still yet to practice blending enough to achieve that so I revert back to my trusty old dry-brushing. It looks okay at a few feet. So I put on the first wash layer, I had thought about using two but there’s not really that much exposed flesh so one pretty much gave me the effect I was after.
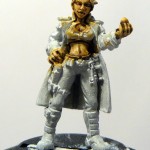 Once that was done, I set about with four dry-brush layers. On an area this small you can’t really get the full dramatic effect that dry-brushing can give, which is why blending is so much better. However, you can still bring out the detail if you’re careful. So I started with Elf Flesh darkened a little (since the overall area is now darker thanks to the wash), then Elf Flesh alone and then two layers of Elf Flesh lightened. Each time I used less and less paint on the brush. Normally I’d stop there, however since I was working on this for the diary I really wanted to at least try something new. So I used the wash again but rather than coating the whole area I just painted it into the specific recesses I wanted to really darken. The edges by the cloak, her belly button, around her nose a little, eye sockets and cleavage. I was really pleased with the added depth that gave the skin. Throughout the whole flesh / dry-brush section I was pretty careful to keep the paint just on her midriff and face to make painting her hair and cloak easier later. However with her hands, it was okay to be a bit more cavalier with the paint and worry about making the gloves look like true half-finger gloves when I come to paint those. I expect I’ll be painting them to look like black leather and that hides a lot of sins in terms of messy paint jobs.
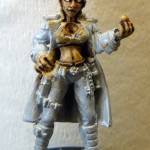 Finally it was time to have a go at the eyes. I dread this stage because frankly I’m terrible at it. I probably don’t get enough consistent practice (I usually end up having very long breaks between miniatures where I care enough about the final result to spend more than 30 seconds painting the eyes). The eye sockets / balls are pretty big on this figure, almost anime in style, and I wanted to reflect that with the paint work, making them bold and clear. So I painted the eye ball white, and then dabbed black on. Most of the white is hidden, there’s just a tiny bit on the edges. I had to go back and make a couple of minor corrects with Elf Flesh and some wash to cover up some black lines. I didn’t get the effect I was truly aiming for (one day, I promise), but I’m still quite pleased with the eyes overall. They’re big and bold but not huge white and staring which can sometimes be an issue.
I really don’t have the eyes for painting truly fine detail these days and I need to consider either some glasses or a (better) magnifying lens. I have a daylight bulb lamp with a magnifying area but it was pretty cheap and getting the magnification lens in the right place means I heat my hands up to about 200 degrees which isn’t that useful overall.
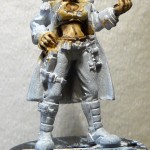 Once I’d finished the blacks of the eyes, I painted in some Snakebite Brown eyebrows and placed a little red wash over the lips to give them some depth, the end result is a face which looks more like a monkey than a human being. Ah well. There’s probably a couple of hours worth of work in the miniature today, although it would have taken less time without needing to set the camera up after each stage. I wanted to photograph each of the dry-brush stages, but I found that I really felt more comfortable applying them in quick succession. When I take photo’s I was having to get the white paper box under the lamp, position the figure, take a bunch of photo’s, move the paper and lamp, do the next stage of painting. During all that moving around I was losing the flow almost of applying the paint, I do get into a rhythm and it was almost knocking me off balance in a way.
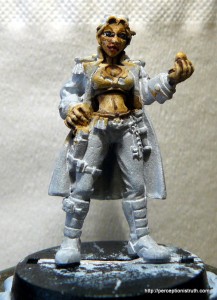
So, when I’m doing the larger sections like the cloak or trousers, it may be that I keep the photo’s down to the main stages, base coat, wash, full dry-brush, detail layer etc. We’ll see how it goes. Anyway, here’s the last shot of the mini for now, complete with dodgy eye brows (I’ll do something with those when I do the hair, but the eyes looked worse without some dark area above them) and ruined lips (I may try and fix that).
 Next part will be some of the major cloak work I expect, and perhaps I’ll have a go at the hair (something else I’m terrible at).
